
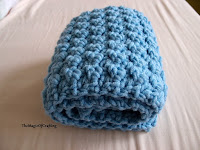
Easy crochet pattern that uses only basic stitches - ch, sc and dc. Easily adapted for smaller and larger sizes, just make sure you have an even number of stitches.
Add to Ravelry queue
*** This pattern is free. You may sell the products you make from my patterns but not the pattern itself. If you sell items from this pattern please link back to this post. Do not copy and repost this pattern or any of the photos and claim them as your own. ***
Do you like this pattern?
NOTE: Each ch2 at the start counts as dc. I ch 2 for dc instead of ch 3 - it makes the start of the row almost invisible. If you are more confortable with ch 3 for dc then go for ch 3 :)
Each row is ended with ss in the ch 2 but the pattern can be worked in spiral with no joining, just make sure you have even number of st.
Hat pattern:
Do you like this pattern?
This pattern uses US crochet terms.
Yarn: 50% acryl, 50% wool, super chunky (for 8mm hook, I have used hook size 9 for the hat)
Yarn: 50% acryl, 50% wool, super chunky (for 8mm hook, I have used hook size 9 for the hat)
Hook size: 9mm/M
Stitches used: ch, dc, sc
Adult size - the pattern described is for adult size but is very easily adaptable for smaller/bigger sizes. For smaller sizes (toddler) skip last row of dc increases (40 st overall instead of 50 for adult). If you need bigger size add one more row with dc increases. The rule I follow here is 10 dc increases each row, evenly spread.
Gauge: 9 st and 6 rows = 4in/10cm square in dcAdult size - the pattern described is for adult size but is very easily adaptable for smaller/bigger sizes. For smaller sizes (toddler) skip last row of dc increases (40 st overall instead of 50 for adult). If you need bigger size add one more row with dc increases. The rule I follow here is 10 dc increases each row, evenly spread.
NOTE: Each ch2 at the start counts as dc. I ch 2 for dc instead of ch 3 - it makes the start of the row almost invisible. If you are more confortable with ch 3 for dc then go for ch 3 :)
Each row is ended with ss in the ch 2 but the pattern can be worked in spiral with no joining, just make sure you have even number of st.
Hat pattern:
Start with magic circle, ch2 (counts as dc), 9 dc into the circle, ss into ch 2 (10 dc).
Row 1 - ch2, dc in same st, 2 dc in each st, ss at the end in ch2 (20 dc).
Row 2 - ch 2, dc in same st, *dc in next st, 2 dc in next st*, repeat * - *, ss in ch 2 (30 st).
Row 3 - ch 2, *dc in next 2 st, 2 dc in next st*, repeat * - *, ss in ch 2 (40 st).
If you need toddler size skip the next row.
Row 4 - ch 2, *dc in next 3 st, 2 dc in next st*, repeat * - *, ss in ch 2 (50 st).
Pause: Now it is the time to check your gauge.
These number of st should be enough for adult size hat. Check the crochetted crown for the size wanted. It has to be slightly bigger as it will shrink when you start with the basic pattern. My crown measured nearly 18.5 cm.
If you need bigger hat add one more row of dc increases, otherwise continue with the pattern below.
Row 5 - ch2, 1 sc in same st, *skip one st, dc, sc in next st *, repeat * - *, ss in ch 2
Row 6 - ch 1, sc in same st, sc in each st around, ss in ch 1.

Repeat row 5 and row 6, finish with a row of sc. The lenght of the hat I made is 8.5in/21cm.
If you want to change colors - I swapped color to black when the hat length was 6.5in/17cm and it was time for row 5, then I repeated row 6, and then swapped back to blue again.
You can make whatever flower you like or leave it without.

The flower I made is very simple and here is the pattern if you like it:
Magic circle, ch1, 9 sc in the circle, ss in ch1
Row 1: ch1, *hdc, dc, ch 2, dc, hdc in the same st, ss in next st *, repeat 4 more times and cut the yarn
That's it :)

For matching scarf check out my Easy Textured Scarf pattern
Find me on


gracias,para mi leer los grafico son mas facil de interpretar
ReplyDeleteI have a question regarding the hat pattern: On row #3 & #4 after the ch 2 do you do a dc in the same stitch? Like in the previous rows? If you don’t do the dc in the same stitch the count does not come out right? Thank you so much, DiEtta
ReplyDeleteHow many stitches in magic circle”
ReplyDelete